
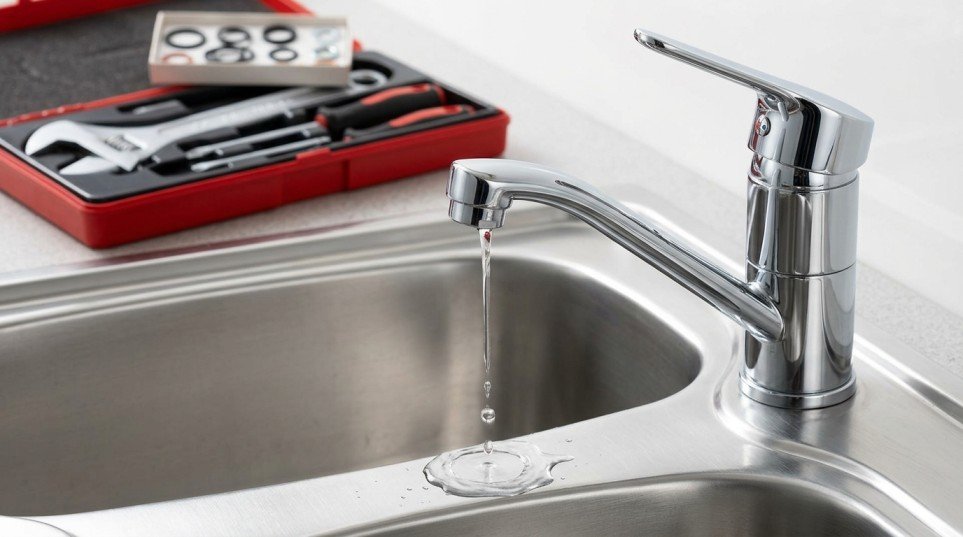
🔧 Introduction:That “Drip… Drip…” Is Costing You More Than You Think
A leaky faucet might seem like a small annoyance—but over time, that constant drip can waste hundreds of liters of water and increase your utility bill. The good news? You don’t need to call a plumber every time this happens.
If you’ve been searching for how to fix leaky faucet, you’re in the right place. This guide will walk you through a simple, beginner-friendly process to repair it yourself—saving money, time, and frustration.
And the best part? You probably already have most of the tools at home.
🚿 Why Faucets Leak (Understanding the Problem First)
Before jumping into the fix, it’s important to understand why faucets leak. Most leaks happen due to worn-out internal parts.
Common Causes:
- Worn-out washers
- Damaged O-rings
- Corroded valve seats
- Loose parts
- High water pressure
According to the Environmental Protection Agency, household leaks can waste nearly 10,000 gallons of water annually—so fixing even a small drip matters.
🆚 DIY vs Hiring a Plumber
Let’s quickly compare your options:
| Factor | DIY Fix | Hiring a Plumber |
|---|---|---|
| Cost | Very low (Rs. 2$–5$) | Expensive (200+$) |
| Time | 20–40 minutes | Depends on availability |
| Skill Required | Beginner-friendly | Not required |
| Satisfaction | High 😊 | Neutral |
👉 Verdict: For minor leaks, DIY is the smarter choice.
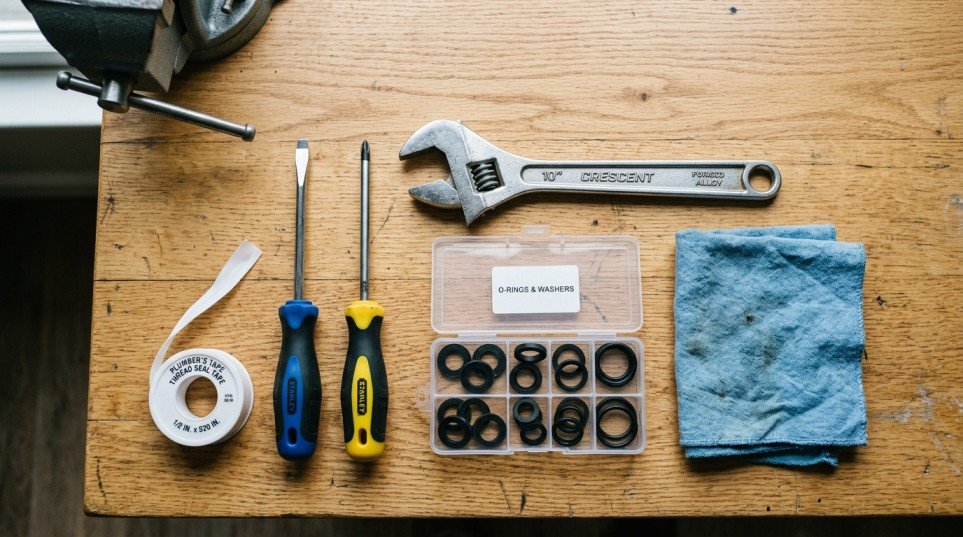
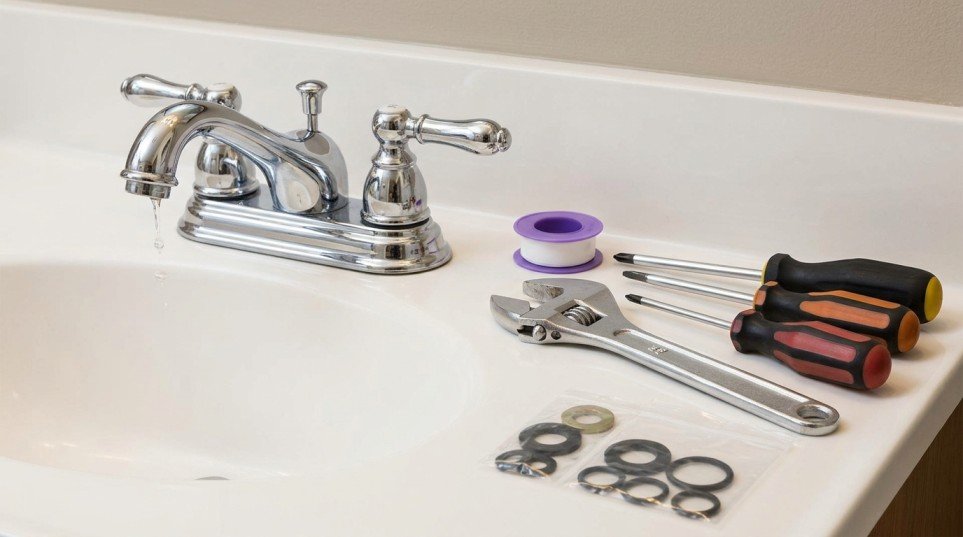
🧰 Tools You’ll Need
Before starting, gather these tools:
- Adjustable wrench
- Screwdriver
- Replacement washer/O-ring
- Plumber’s tape
- Cloth or rag
💡 Tip: Take the old part with you when buying a replacement to ensure the correct size.
🔍 Identify Your Faucet Type (Important Step)
Not all faucets are the same. Identifying your type makes the fix much easier.
1. Compression Faucet
- Two handles (hot & cold)
- Most common in older homes
2. Ball Faucet
- Single handle
- Found in kitchens
3. Cartridge Faucet
- Smooth handle movement
- Common in modern homes
4. Ceramic Disk Faucet
- High-end, durable
- Less prone to leaks
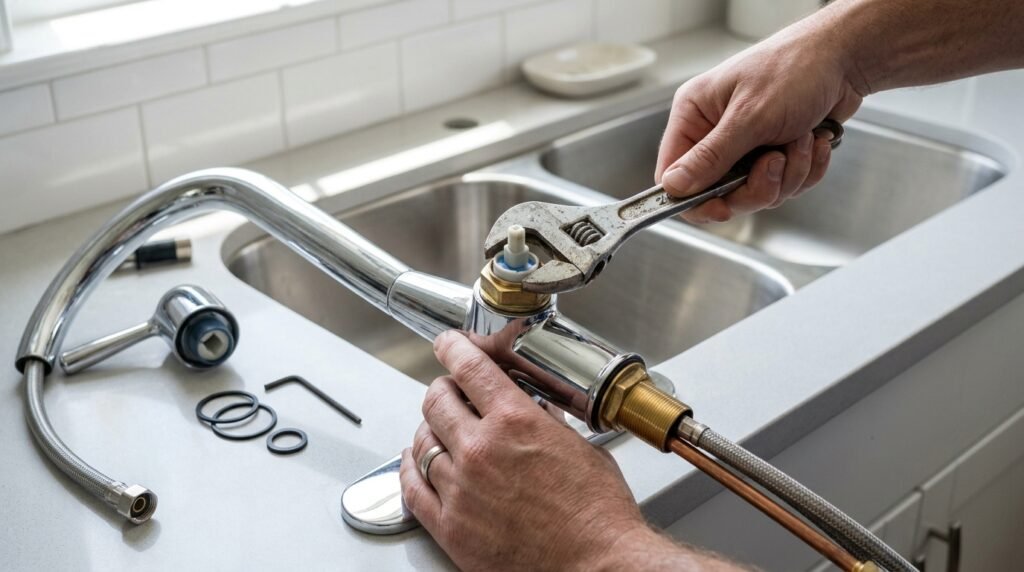
🛠️ Step-by-Step Guide to Fix Leaky Faucet
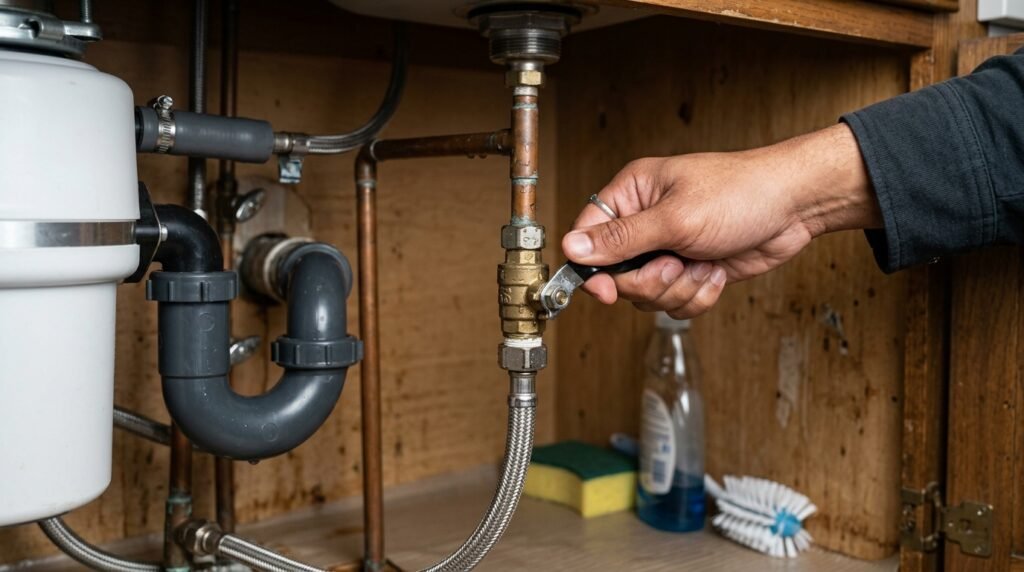
Step 1: Turn Off Water Supply
Always start by shutting off the water supply under the sink.
👉 If you skip this step… expect a mini flood 😅
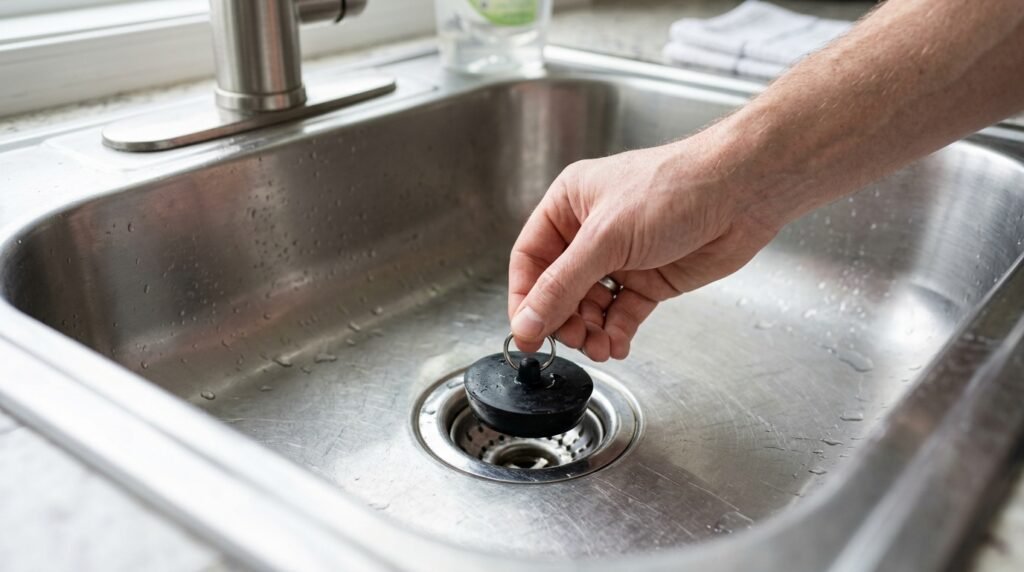
Step 2: Plug the Drain
Use a cloth or stopper to prevent small parts from falling into the drain.
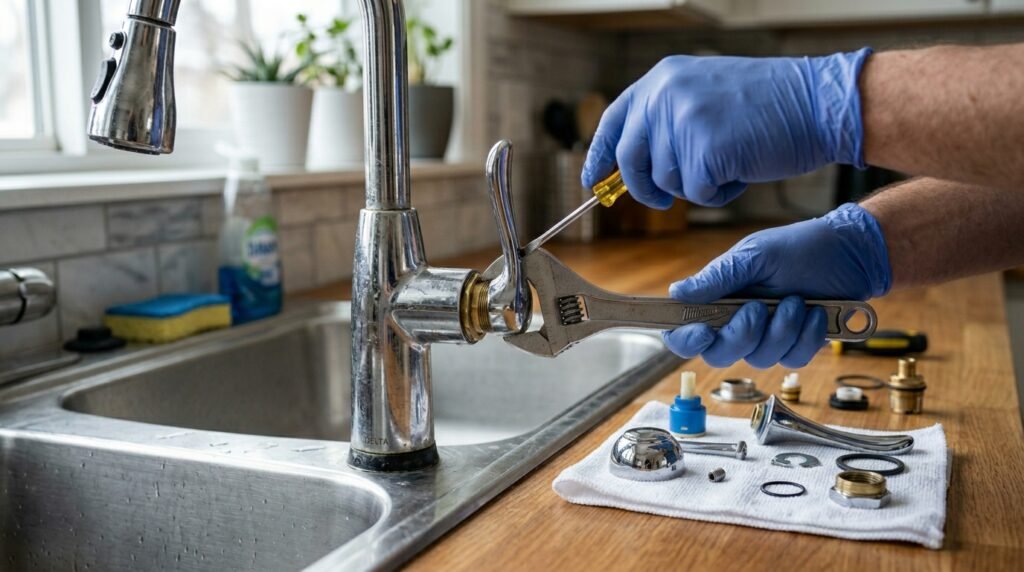
Step 3: Disassemble the Faucet
- Remove the handle using a screwdriver
- Unscrew the packing nut
- Carefully take out internal parts
💡 Take a picture before removing parts—it helps during reassembly.
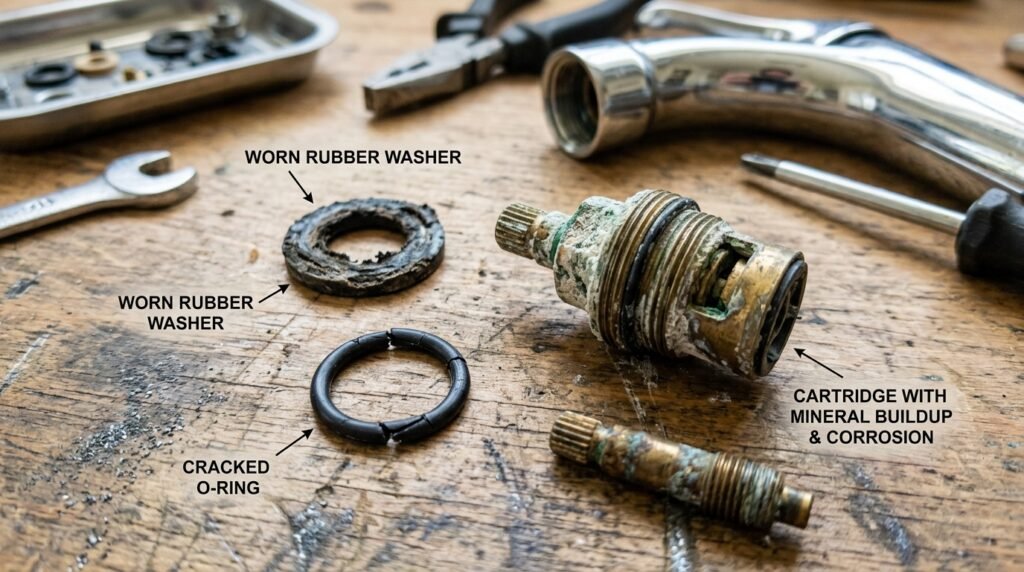
Step 4: Inspect the Problem Area
Check for:
- Worn washer
- Cracked O-ring
- Mineral buildup
👉 In most cases, the washer is the main culprit.
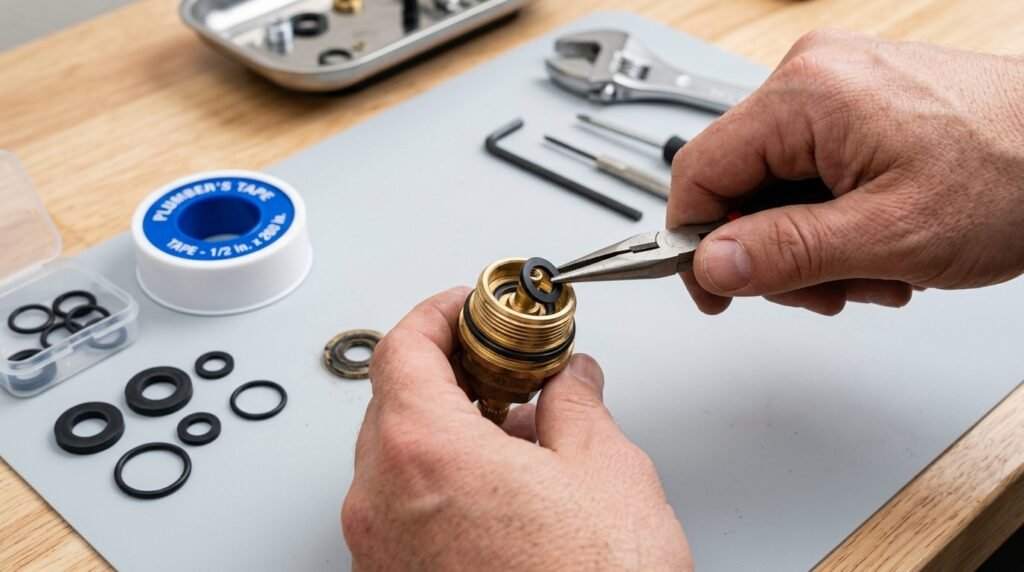
Step 5: Replace the Damaged Part
- Remove the old washer/O-ring
- Install a new one of the same size
- Apply plumber’s tape for a tighter seal
Step 6: Reassemble the Faucet
Put everything back in reverse order and tighten properly.

Step 7: Turn Water Back On & Test
Slowly turn the water supply back on and check for leaks.
✔ No drip? Congratulations—you just fixed it yourself!
📊 Common Problems & Quick Fixes
| Problem | Likely Cause | Solution |
|---|---|---|
| Constant dripping | Worn washer | Replace washer |
| Leak from handle | Damaged O-ring | Replace O-ring |
| Low water pressure | Mineral buildup | Clean aerator |
| Noise in faucet | Loose parts | Tighten components |
Also Read: Beginner Budgeting Plan for Average American Income in 2026

eally enjoyed reading this! For anyone looking to level up their video content, I’ve been using Pixwit at pixwit ai — it supports Veo 3.1, Kling V2.5, Sora 2, and Runway Gen 3 all in one place. No more juggling multiple subscriptions. The AI avatar feature alone is worth it.
Excellent content! Running ad campaigns used to drain our team’s energy until we found FreeVideoGenerator. The UGC Ad Video feature is brilliant — upload a product image, type a quick prompt, and you get an authentic-looking video ad in minutes.
Such a helpful article! For marketers, Nano Banana 2 is a powerhouse — ad creatives, packaging mockups, and branded visuals with accurate text rendering, all at 4K resolution. The multilingual localization feature lets you translate on-image text while keeping visuals intact.
Изысканный подарок для особенного случая —колько стоят бриллиантовые серьги[/url].
В начале стоит рассмотреть особенности материалов и качества камней.
hello world
Si estas necesitas saber donde contratar jets de agua en Tenerife, hay multiples alternativas interesantes tanto en el sur como en diversas zonas como el area de Costa Adeje y Playa de las Americas. Podras hallar alquiler moto de agua Tenerife sur con costos accesibles y excursiones como jet bike safari o aqua safari que unen energia y panoramas increibles. Para alternativas mas precisas, tambien se puede encontrar la opcion de conseguir motos de agua en Tenerife Los Gigantes o experimentar experiencias acuaticas en este enclave. Para mas datos sobre horarios disponibles y precios, te aconsejo visitar
Asimismo, Tenerife proporciona posibilidades para diferentes niveles, desde novatos hasta veteranos, con empresas como Jet Hub Tenerife y Adrenalina Jet que realizan recorridos en motos marinas y jet ski safaris en lugares como Costa Adeje. Si buscas una aventura completa y tranquila, evalua las excursiones motos de agua Tenerife sur o en otras areas, y no olvides que asegurar con adelanto siempre es recomendable, especialmente en los meses de mayor demanda. Por si lo precisas, el telefono +34 612 345 678 es util para consultas rapidas.